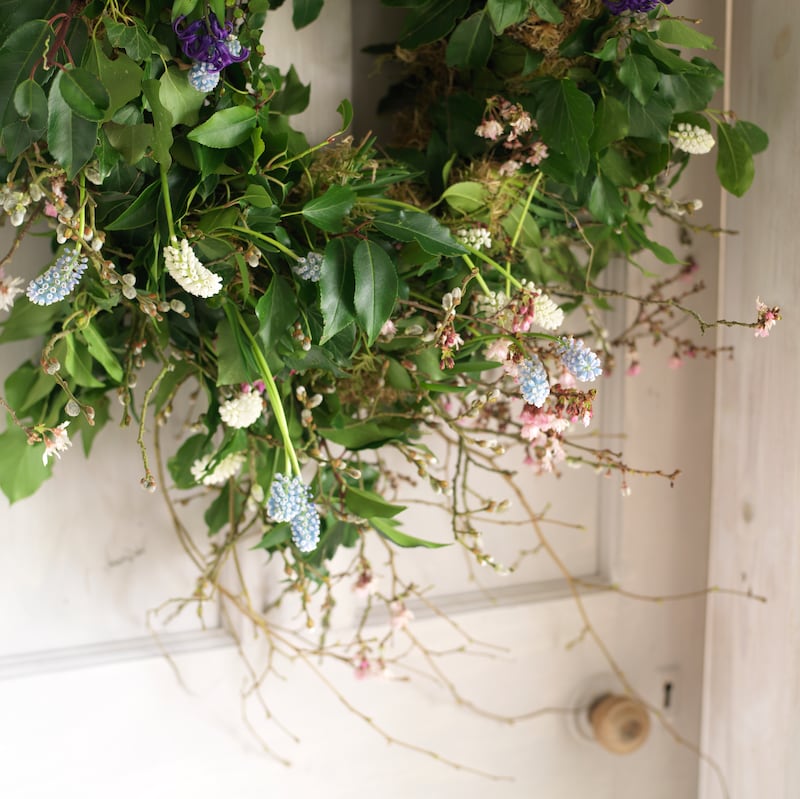
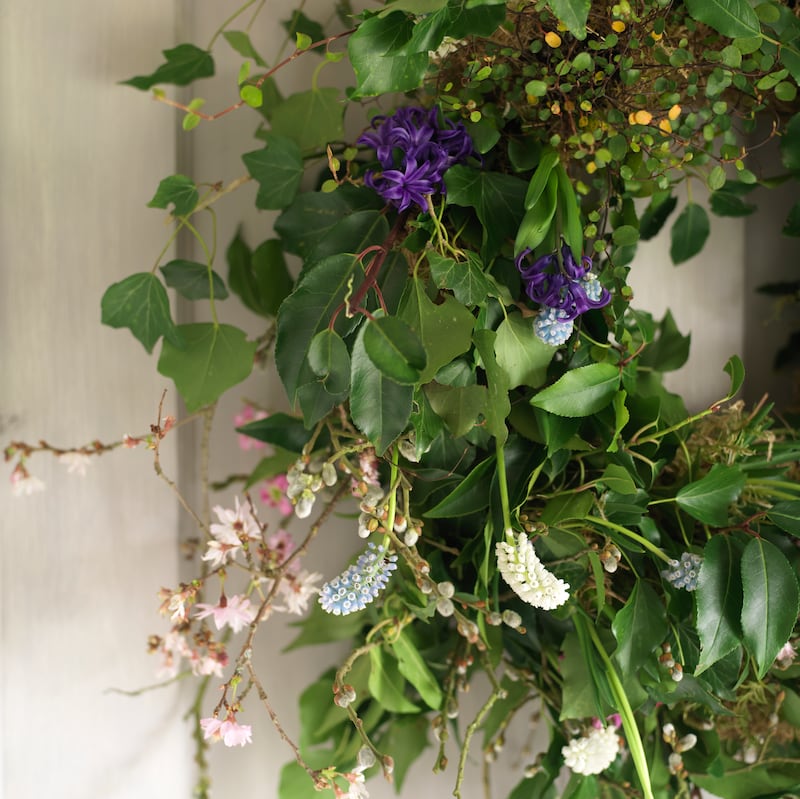
Scroll through the social media feed of great gardeners and florists, and what’s noticeable is that wreaths are now no longer just for Christmas. Instead, with a little clever tweaking and some kokedama-style use of moss, they’re being used to decorate our homes throughout the year.
These seasonal floral creations do not have to rely on the use of environmentally-harmful floral foam (or Oasis as it’s often known) to keep stems fresh. Instead, by using an array of hardy spring flowering bulbs in full bloom, some small flowering plants with their compact root systems concealed within damp moss and some resilient evergreen foliage, you can create a “living” wreath that will continue to look good for at least a couple of weeks. After the best of its seasonal display of flowers has come to an end, it can then be “unpacked” and those same bulbs and plants given a suitable permanent spot in your garden or allotment, making it a gift that keeps on giving. With Mother’s Day only just around the corner, here’s a step-by-step guide to creating it.
What’s needed:
- One 14-inch or 16-inch wire wreath base (see oneillsflowers.ie, this can be reused again and again for future projects).
- A reel of fine, strong binding wire (also oneillsflowers.ie, or some strong green garden string).
- Some moss, respectfully foraged.
- Some mixed stems of evergreen foliage and twiggy branches. For this wreath I’ve used ivy, Portuguese laurel, willow and some foraged spring blossom, but other suitable evergreens commonly grown in Irish gardens include pittosporum, bay, box, viburnum, sarcococca, drimys, and pseudowintera. Whatever you use, make sure to condition the stems well by stripping off the lowest leaves and placing them in a bucket of water overnight. With very woody stems, use a vegetable peeler to strip off the outer layer of bark which will help to fully hydrate them.
- A pot or two of small spring flowering bulbs in bloom. You’ll find a wide selection in garden centres at this time of year. Suitable examples include grape hyacinths, snowdrops, crocus and miniature daffodils, all of which have smallish bulbs that are easiest to conceal. But it’s also possible with practice to use some species with larger bulbs such as the true hyacinth.
- Four-five small young plants, using species with fibrous rather than spreading fleshy root systems. In this wreath I’ve used different kinds of spring-flowering saxifrage and forget-me-nots in bloom plus muehlenbeckia bought in my local garden centre as small potted specimens in 9cm plastic pots. Both flowering bulbs and potted plants should be watered well a few hours before making your wreath to fully hydrate their root systems.

Step 1: Cover your wire wreath base with a plumpish layer of damp moss on both sides, securing it in place by repeatedly wrapping binding wire/garden string tightly around it, beginning with one end of the wire/string firmly tied to the wire base. The aim is to conceal the circular wire frame and provide a doughnut-shaped moss cushion to which you can then attach foliage, plants and flowering bulbs. The finished mossed-up wreath base should be firm but not so rigidly firm that it would be very difficult to stick the ends of some twiggy branches into it. To stop it loosening or unravelling, tie the wire/ string with a few knots once you’ve worked your way around the entire base but leave it still attached to the base so that you can then continue using it to secure your plants, foliage, and flowering bulbs in position.
Paschal Donohoe’s worst sin: being ‘a wee bit scabby on nights out’
First look: Hoxton Hotel brings back Dublin’s Library Bar and a new iteration of Rí-Rá
Clodagh McKenna: ‘I don’t have the budget for caterers – I’m not in that league’
Joanne McNally: ‘I was like, I’ll absolutely fly to Ireland and play golf with Bill Murray’
Step 2: Remove any small flowering plants from their pots and gently vertically flatten their root balls as much as you can while making sure not to damage them. Then take a small handful of damp moss and lightly wrap it around the root-ball of the first plant that you want to place on the mossed-up wreath base. Similar to kokedama-styled plants, this moss will conceal and protect the plant’s root system as well as help lock in moisture.
Position the plant on the mossed-up wreath base, then use the reel wire/garden twine to secure it by gently coiling it over its mossed-up root-ball and around the wreath base a few times. Again, tie the wire/string with a few knots but leave it still attached to the base so that you can continue using it to secure more plants, foliage, and flowering bulbs in position.
Step 3: Take some short stems of evergreen foliage and twiggy branches (10cm-15cm long) and position these next to the plant that you’ve already fixed on to the mossed-up wire base, using them to conceal its mossed-up root system. They should be placed so that their ends are all pointing in roughly the same direction (either clockwise or anti-clockwise) and in such a way that a few stems are to the inside of the wreath, some to the centre and some to the outside. This will make your wreath look nicely full and help to conceal the moss base.
Once again, continue to use the binding wire to fix these in position by coiling it firmly over the base of the stems and around the mossed-up base several times to secure the bottoms of the stems in place. Take care while you’re doing this to avoid accidentally damaging the plant you’ve already fixed on to the wreath.

Step 4: Remove two-three individual flowering bulbs from the pot, gently teasing them away from the clump to make sure their root systems remain intact. Lightly wrap each of the bulbs and their root systems in a thin layer of damp garden moss, then tuck these in among the foliage that you’ve just positioned in place, making sure to bury their bulbous ends into the wreath as deep as you can.
Again, position them so that the flowers are all pointing in the same direction as the foliage. As before, use the binding wire/garden string to secure these flowering bulbs in place, taking care not to accidentally cut into the bulbs or flower stems as you do so.
Step 5: Working your way methodically around the wreath base, repeat steps one through three so that each new section that you add is placed to neatly conceal the workings of the previous section (for example, any ends of stems or any obvious wire/string) under a fresh layer of flowers and foliage.
Step 6: Finish off your spring wreath with some nicely wild twiggy bits and/or branches of spring blossom, pushing the end of each stem deeply into the outer edge of the mossy wreath base. If you spot any obvious holes in the design, take a few short stems of foliage and press the ends deeply into the base to conceal them. If you think you’d like to add a few more flowering bulbs, then use the closed blade of your pruning secateurs to make a few small holes in the mossed-up base into which to tuck the bulbs. Finish off by tying a length of pretty ribbon to the top/back of your wreath, making sure that it’s absolutely secured in place (the last thing you want is for it to work loose and your wreath to come crashing to the ground).
[ Why everyone, even feminists, likes Mother's DayOpens in new window ]
[ At Sanctury Convent in Cork, a very different Mother's Day for Ukrainian refugeesOpens in new window ]
This week in the garden
Plant onion and shallots into weed-free, not recently-manured or freshly-dug soil, making sure to give them a sunny, open position and a free-draining but fertile soil. As they don’t produce much leafy growth to help suppress weed germination, both crops can easily get smothered with weeds over the growing season, resulting in poor growth. For this reason, it’s a good idea to plant your onion and shallots into small holes cut or burned into a weed suppressant membrane.
The soft, young shoots of herbaceous plants are emerging from the ground this month, so keep a watchful eye out for slug and snail damage and take suitable precautions where necessary. Certain species are particularly vulnerable to this kind of damage including hostas, delphiniums, echinacea, dahlias and lupins.
Dates for your diary
Tuesday March 21st (7pm), Kilkenny Castle, The Greedy Gardener: How to Have Colour at Every Season, a talk by Rose Maye on behalf of OPW as part of its annual free series of gardening talks, see kilkennycastle.ie
Thursday 23rd March (8pm), Northridge House, St Luke’s, Castle Rd, Mahon. T12H970, An Approach to Garden Design, a talk by Linda Murphy of the National Botanic Gardens on behalf of Cork Alpine Hardy Plant Society, all welcome, admission €10


