
Step by steps
1. Apply a coat of first base base coat, followed by 2 coats of blanc to all nails.

2. For pinky nails, dip your bobby pin (or dotting tool) into midnight cami and create polka dots.
3. On ring fingers apply 2 wide stripes with clambake.

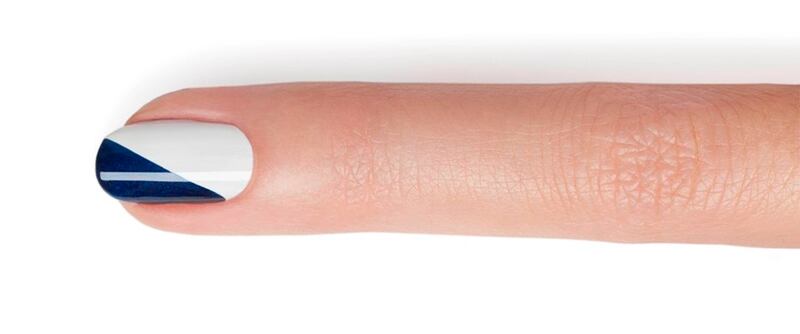
4. On middle fingers, apply midnight cami diagonally halfway down the nail.
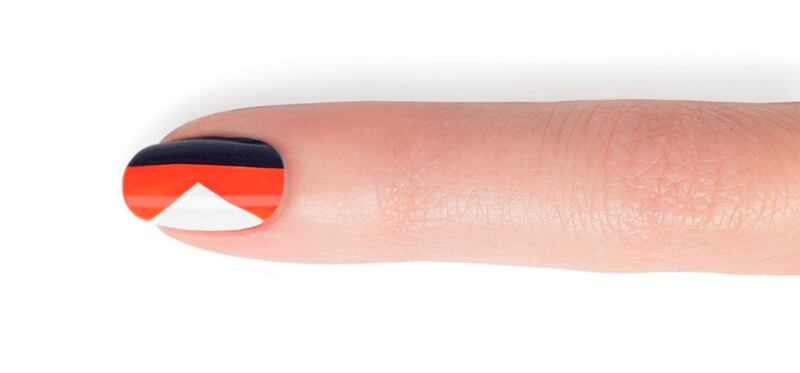
5. On index fingers, draw a diagonal stripe with clambake and another going up creating a “V” shape on the right side of nails.
Once dry, add a vertical stripe of midnight cami to the left sides.
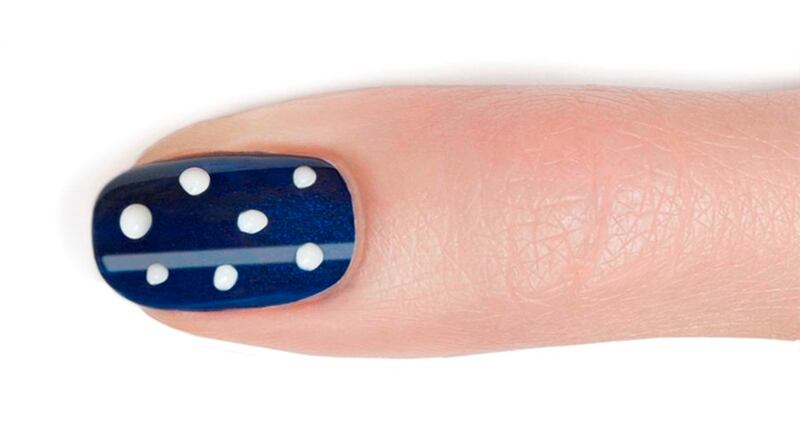
6. On thumbs, paint a coat of midnight cami, add white polka dots with blanc by dipping bobby pin (or dotting tool) into the bottle.
7. Seal the deal with a coat of good to go top coat.

Michelle Saunders Tips
• You can use tape for perfectly straight lines.
• If you use a bobby pin, slightly pull it apart, and use the longer end for easy dipping into polish


